

How to Create Opt-in Forms with Flodesk

An important step in developing your online business is gathering and organizing email addresses from potential customers and followers. This can feel overwhelming if you don’t have the right tools. Let’s start on the right foot. Flodesk has made it so perfectly simple for established websites and those just starting out to get their email marketing up and running. Let me walk you through the process of creating an opt-in form using Flodesk.

First, if you haven’t already use this link to set up an account. Go ahead, I’ll wait right here for you! Next, open up your Flodesk account and click on the Forms menu at the top of the screen. Next select +Create New to start a new form.
How Do You Want to Get Their Attention?
Flodesk offers three different types of forms for you to choose from:
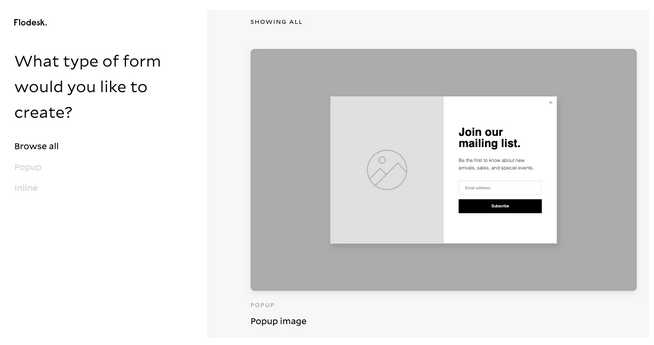
- Popup Form: This form appears as a popup window on top of the landing page when visitors come to your website. You get their full attention for a moment.
- Inline Form: This form appears embedded in the webpage, blog, post, or article. It’s more subtle, and can be at the top, side, middle, or bottom of the page.
- Full Page Form: This form is ideal for those who don’t have an established website yet. It can be published directly to the web and serve as a landing page.
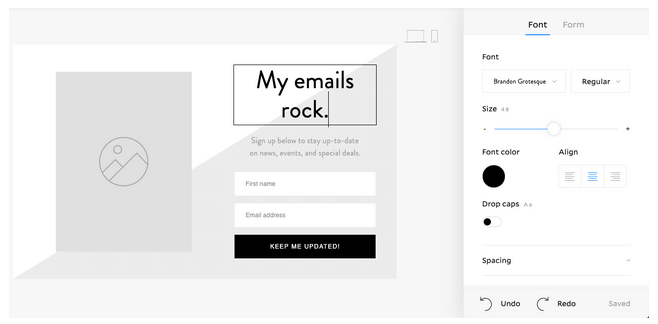
Once you’ve selected your form, it’s time to Customize it! Branding is an important part of creating a memorable business presence. So, go ahead and take your time here. Click anywhere on the form to begin. Upload images, customize the text, typography, and colors. Make it match your brand style.
Don’t Forget
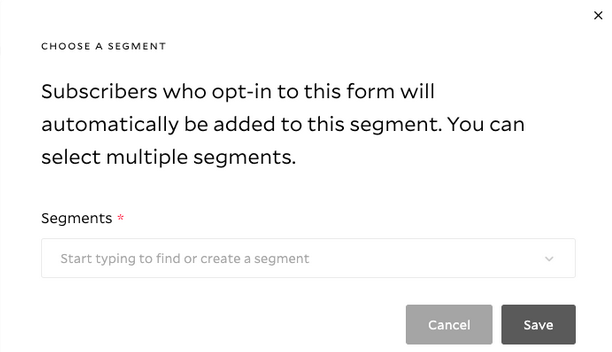
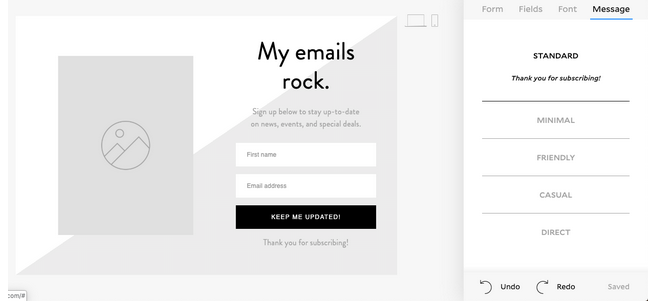
This next step is especially important. To make the most of your opt-in forms, you need to either select an existing Segment, or Create A New Segment. Flodesk recommends that you use one segment for each form you create. Customize success messages for after they subscribe. Let your subscribers know how happy you are they’ve signed up and that they’ve finished the process successfully.
Segments are helpful in a few ways:
- New subscribers are automatically added to this segment when they sign up.
- When you set up automated workflows with Flodesk later on, you’ll need this information.
- Retrieve reports on how successful your form performed to help you determine future changes.
- They keep your subscribers organized—because they are automatically added to this segment, and you followed Flodesk’s recommendation to only use one segment per form, you know who goes where! Nice!
After customizing and segmenting your form, click Next at the top right of the screen and it will pull up some more form preferences. Here, you’ll find options for you to choose regarding when the form is displayed and to whom. Another option is to choose whether you are notified or not each time a new subscriber opts in.

Almost Done!
Guess what? You are almost done creating your first opt-in form with Flodesk! So, the last step is to embed the HTML codes. This step varies a bit based on the type of form you elected to create.
- Popup Forms have one code snippet: Copy and paste it into your header before the /head tag in your website’s editor.
- For Inline Forms have two code snippets: First, copy one and paste into your header before the /head tag in your website’s editor. Second, copy the other and paste in the location where you want it to appear on the website (page, post, article, or sidebar).
- Or publish directly to the web for Full Page Forms, and you are all done!
Not too shabby huh? Go ahead, pat yourself on the back! You did an awesome job!
To learn more about how to set up your first welcome email using Flodesk, check out this article next:
How to Set Up Your First Flodesk Welcome Email


You said...