
")

Some new things are popping up around Instagram. Have you seen your favorite bloggers have those super cool highlight reels at the top of their feed? Did you know you can have them too?
What are Instagram highlights? Instagram highlights are a filing system for your Insta-stories. When you do a story that you don’t want to disappear after 24 hours, then you can put it into one of your highlight folders. This makes your Insta-story last longer and it also makes it easier for your followers to find content. AND it saves you from having to create the same type of content over and over again.
When I first saw them, I just started putting different stories onto my highlights…rookie mistake. There is a quick easy way to make your highlights look neat and professional. In this tutorial, I’m going to walk you through how to create professional looking Instagram highlights

(Pin this image for later)
Make a list of the different topics that you talk about on Instagram.
Those will be the different highlight “folders” that you will put your stories in. I tell my clients to choose your 3-5 pillars: the 3-5 topics that make up your brand. These pillars are a great place to start. For example, my pillars are email marketing, blogging, photography, Maskcara, Family. Those will be the different highlight folders I create.
Decide on your brand colors
If you don’t have brand colors already, make sure that you have chosen them. You want your feed to look consistent with your brand and your blog.
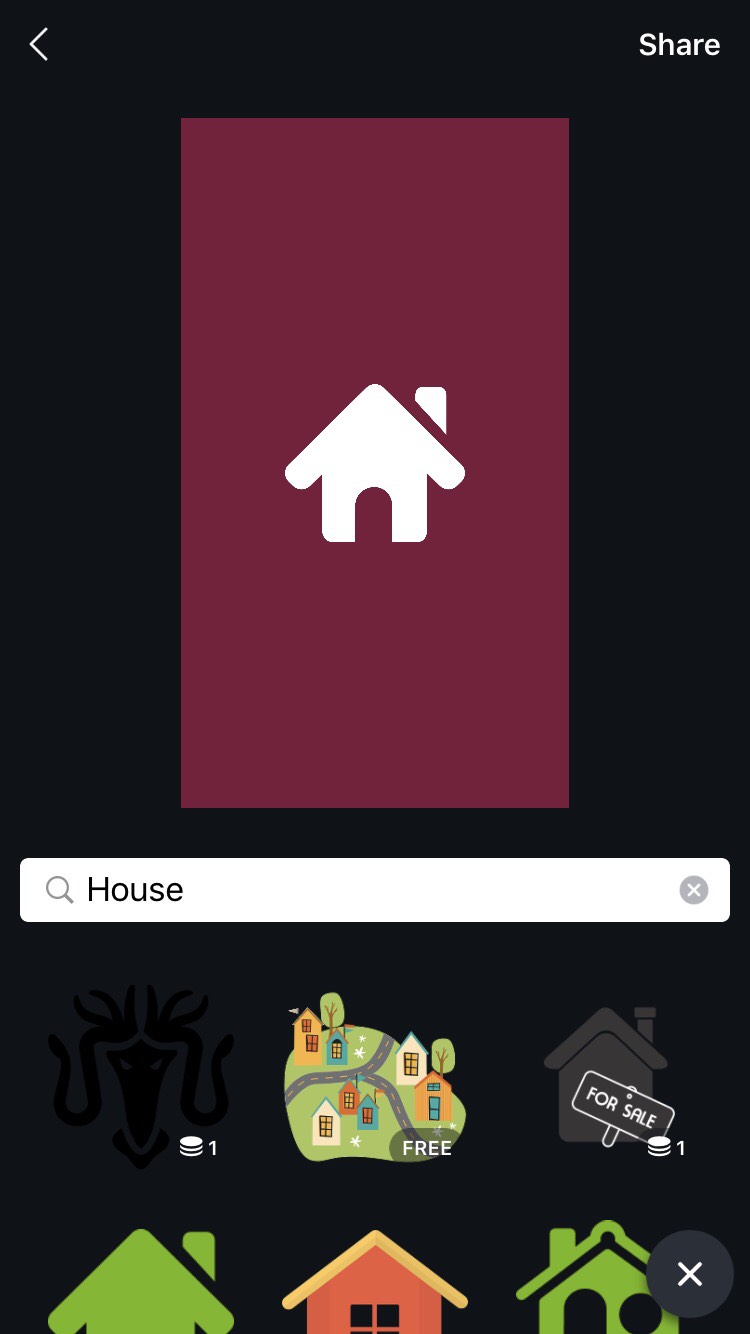
Create a graphic
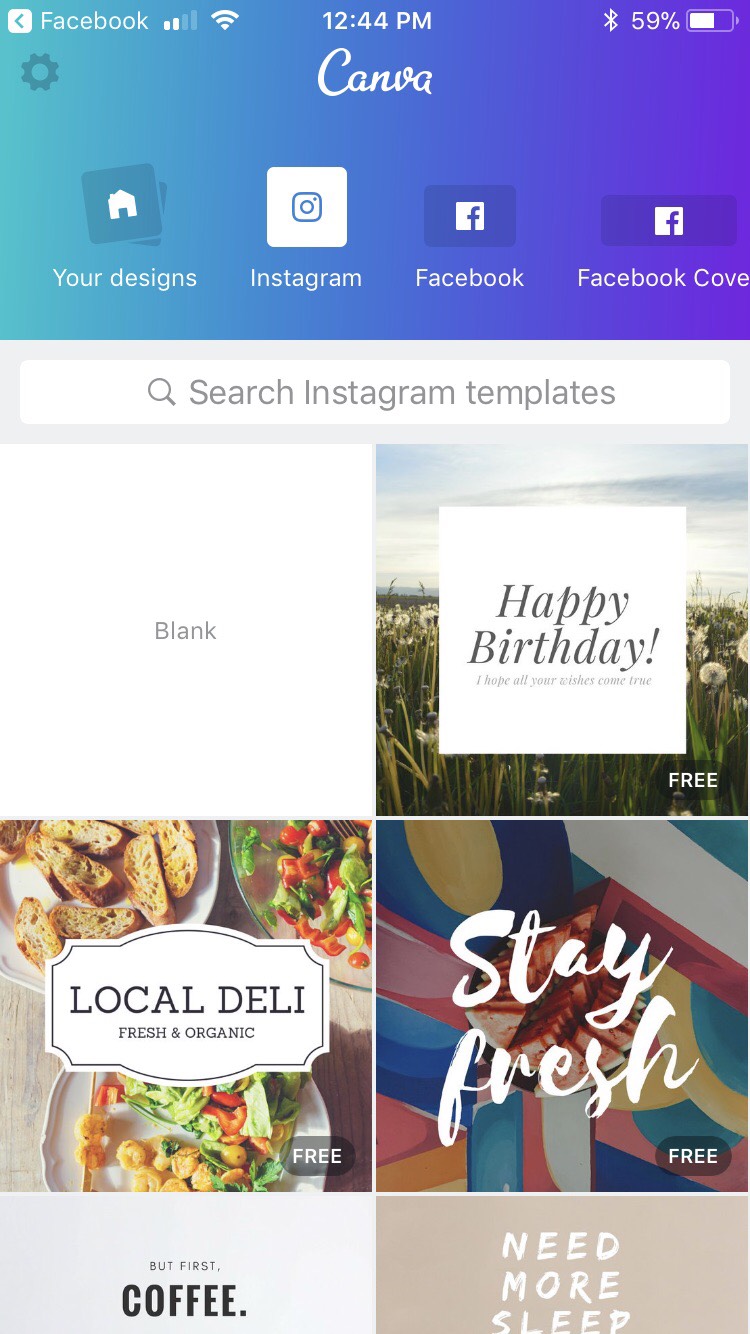
I use the Canva app on my phone to create my images. Download the app and login with your Facebook. Once logged in, choose your design across the top of Canva. This is a list of templates for different sized graphics based on the platform. Scroll through to find the one that says “Your Story”. Click on that to start creating.
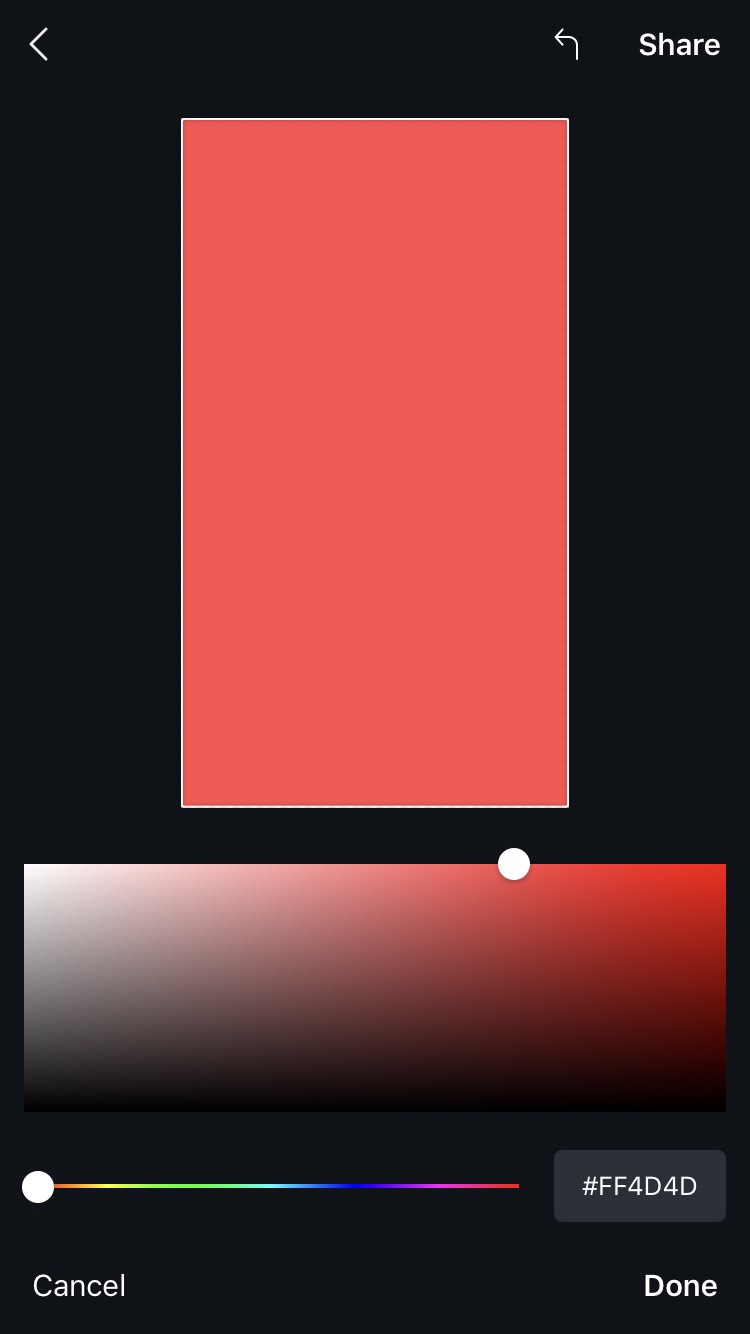
Use your brand color for the background of the graphic
You can use the slider to change the color or put in the color code.
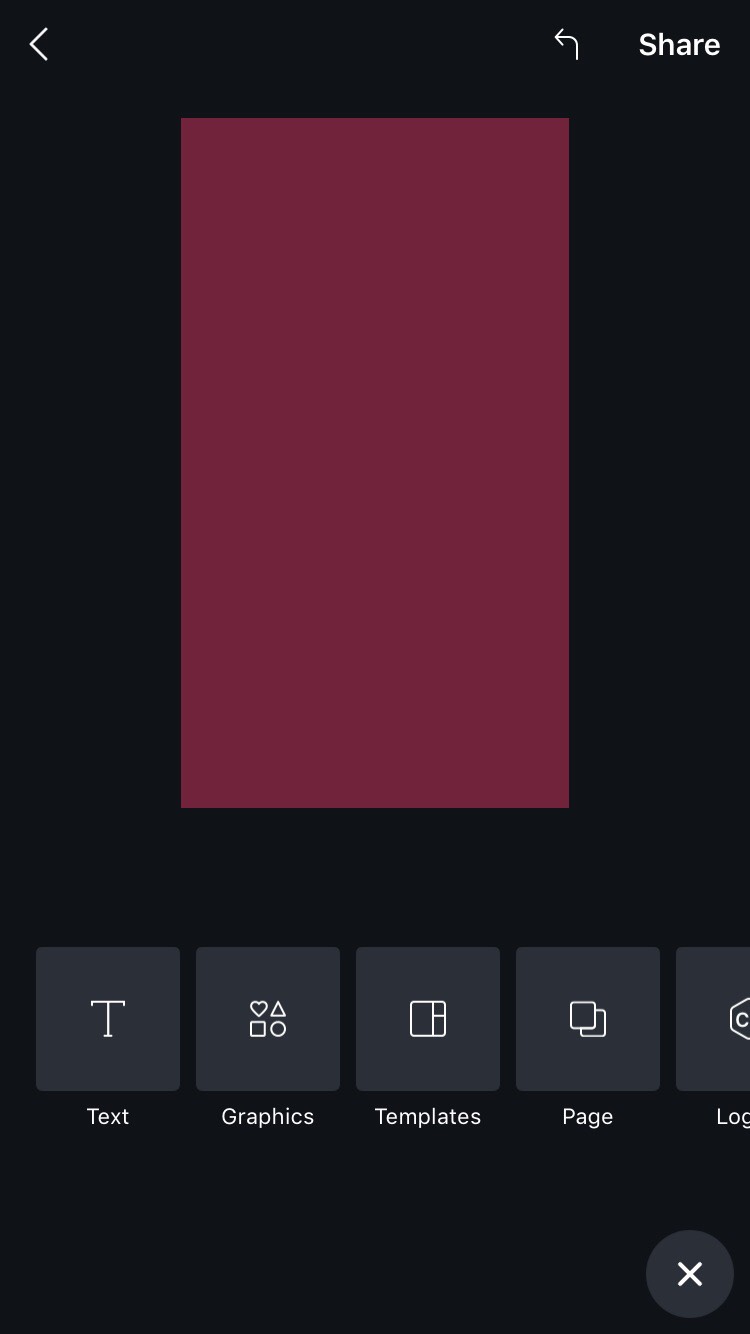
Click the “+” sign at the bottom to add graphic or text
Once you have your color as the background, you can add text or a graphic. You will need to put the graphic or text directly in the middle.
You can search for your graphic and then change it to your color of choice.
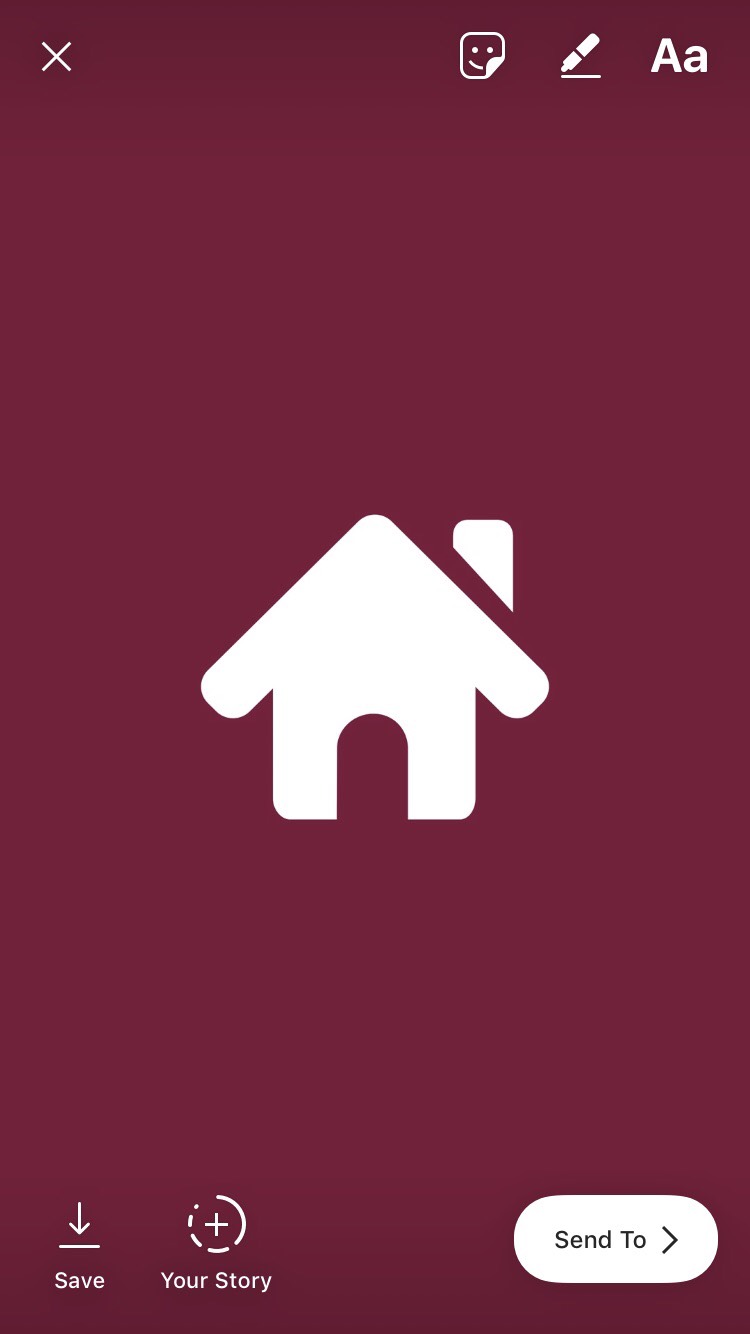
Save new image to your camera roll
Once you have your image created, save it to your camera roll. Then head on over to Instagram.
Open up your stories in Instagram
Choose the image you just created and add to your story.
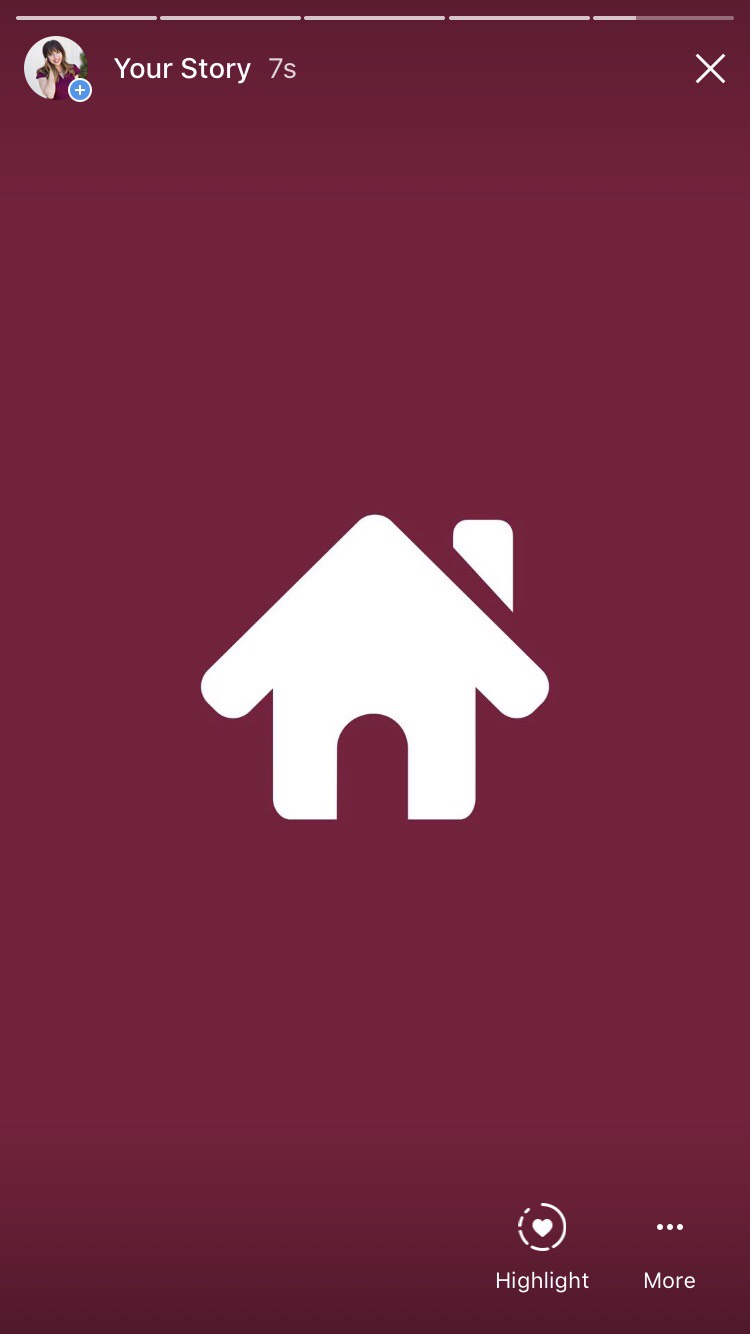
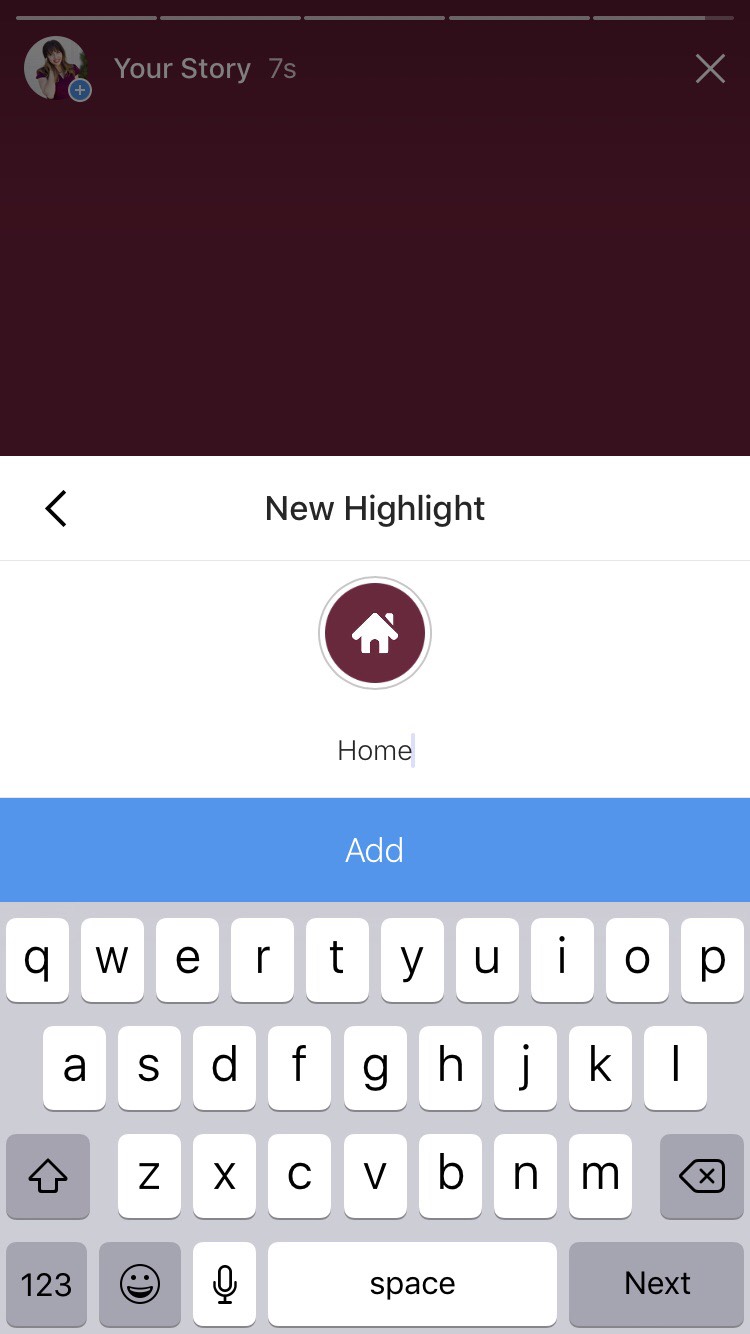
Add to your highlights
Once it is on your story, go and view it and at the bottom there will be a “highlight” option. Click on it.
You will then be given the option to add it to your current highlight or create a new highlight. Create a new highlight.
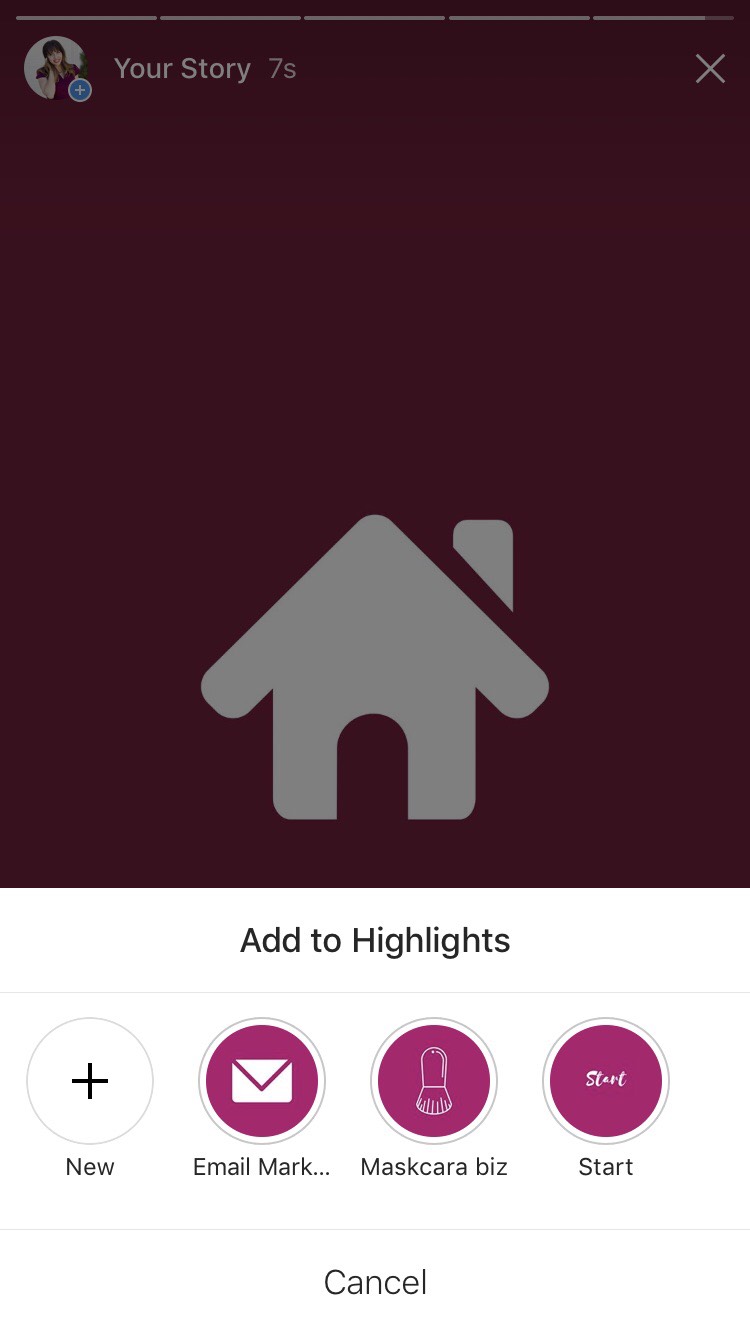
Type in your text of what you want your highlight called.
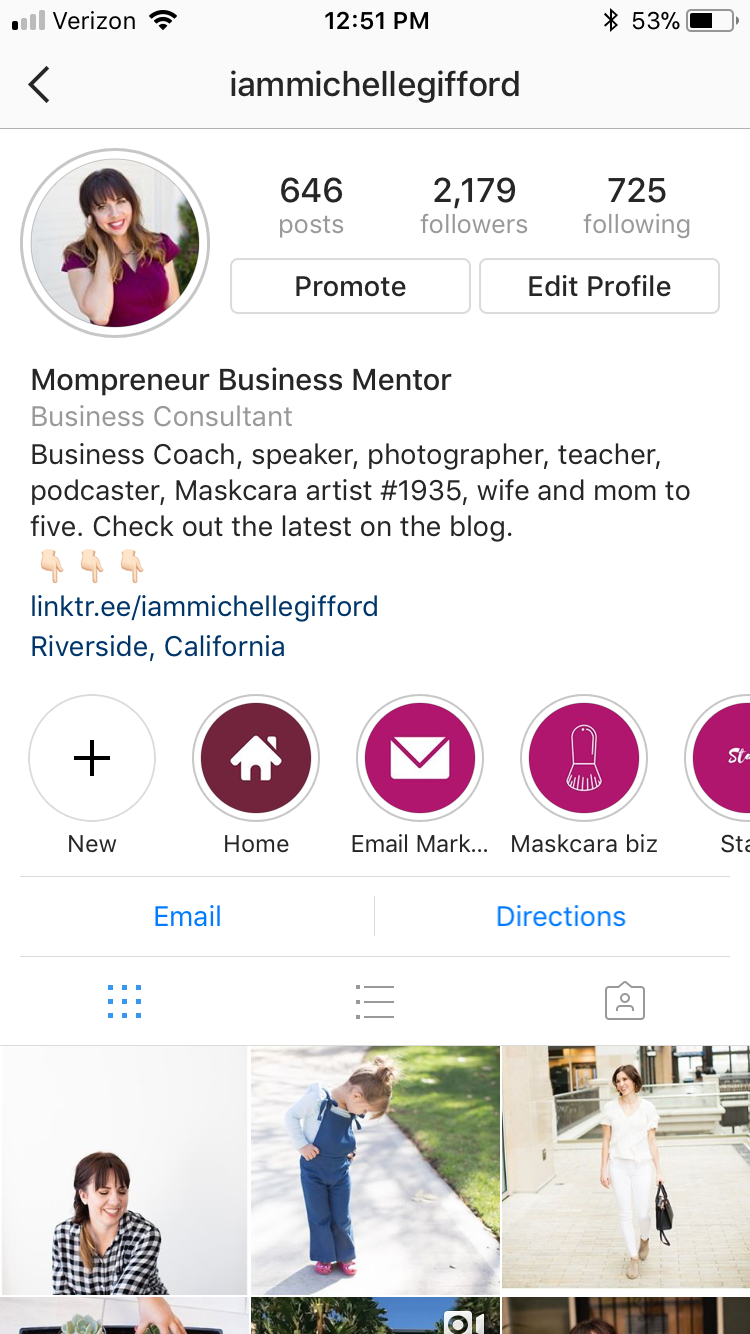
Your highlight folder is now added! Now anytime you do an insta-story, when you go back to view it, you have the option of clicking on the highlight button at the bottom and adding it to your highlight reel.
Now don’t you look super professional? Yep, you do!
That is how you create super professional highlights on Instagram. If you have already started using highlights and you don’t want to start from scratch, but still want that professional looking image, you can add your graphic to your current highlight folder. First put your graphic on your stories and add it to your chosen highlight folder. Then go view your highlights through the profile screen. Click on the three dots at the bottom left of the screen, click edit highlights. Then click on “edit cover” to add your newly created image as the cover of that highlight folder.
I’d love to go check out your new highlights you create. Leave me a comment with a link to your Instagram account so that I can hop on over and say “hi”.


")


You said...