
")


You just started a blog or business or maybe you’ve been in business for a few years and you are ready to stop faking it until you make it and you are ready to look legit. One of the quickest ways to look professional is to create your custom email (and get rid of that @gmail.com business). You may think that it takes a lot of effort or money to do this step, but if you signed up with Bluehost to start your website you can set it up in five minutes or less and its free.
Here is a step-by-step on how to create custom business email address for free through Bluehost and Gmail.
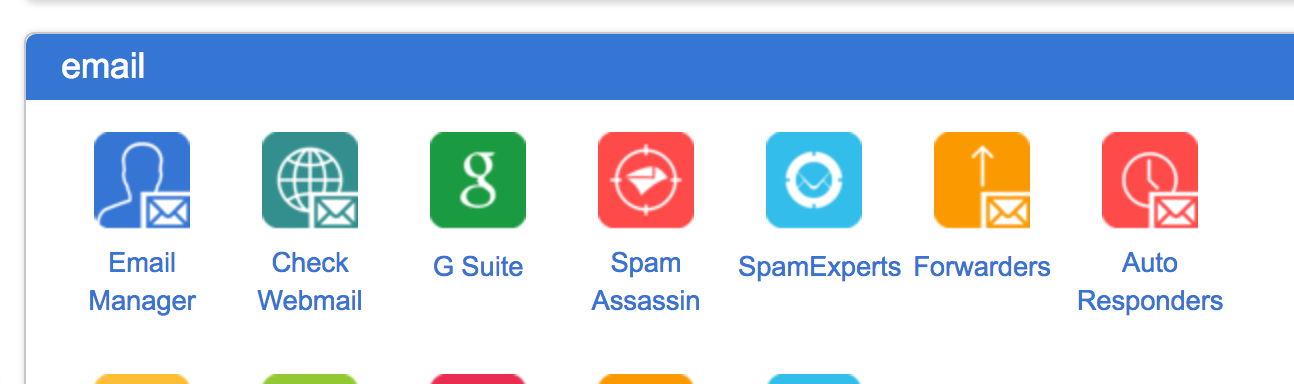
- Create a new email account through Bluehost. Login and click on “Email Manager”
2. Click on “Create New Account”
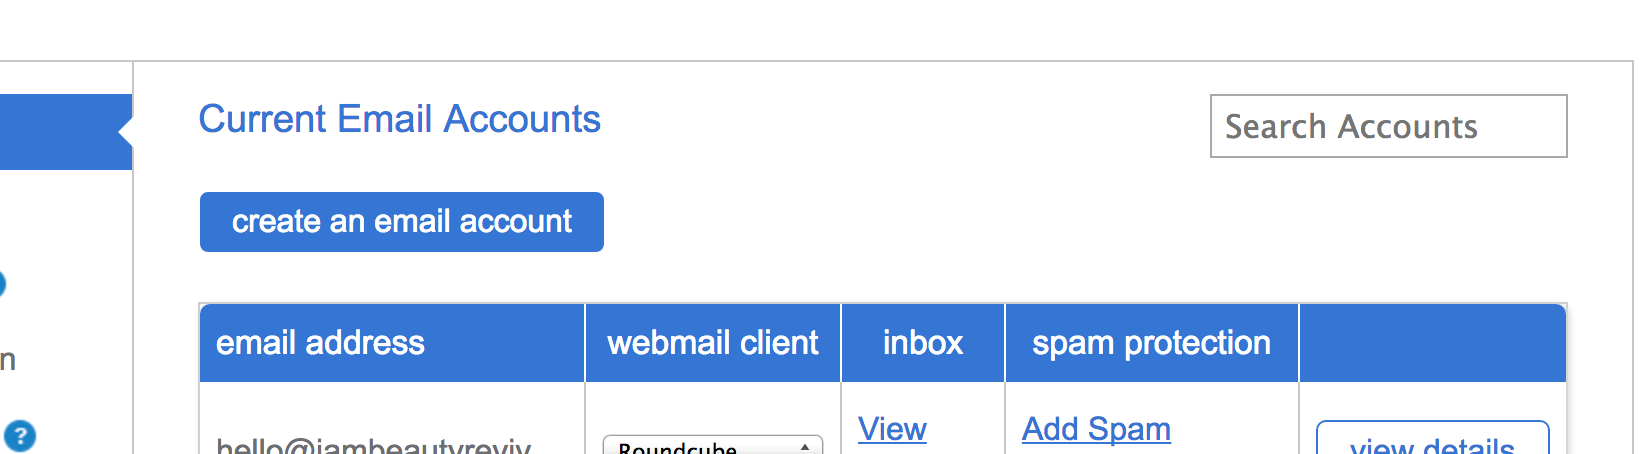
3. Put your email name and choose your website to the side (if you have more than one website). Add a password and click create.

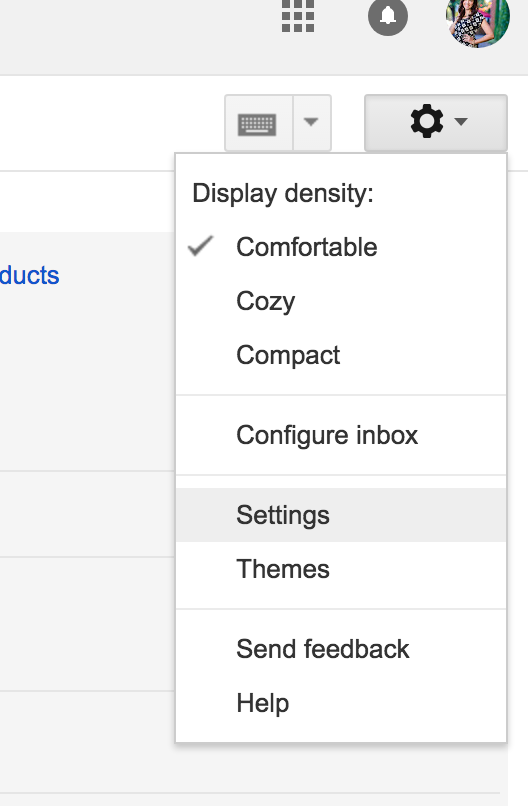
4. Open up your gmail account. In the top lefthand corner, open the Settings cog and choose Settings.
5. Click Accounts and Import.

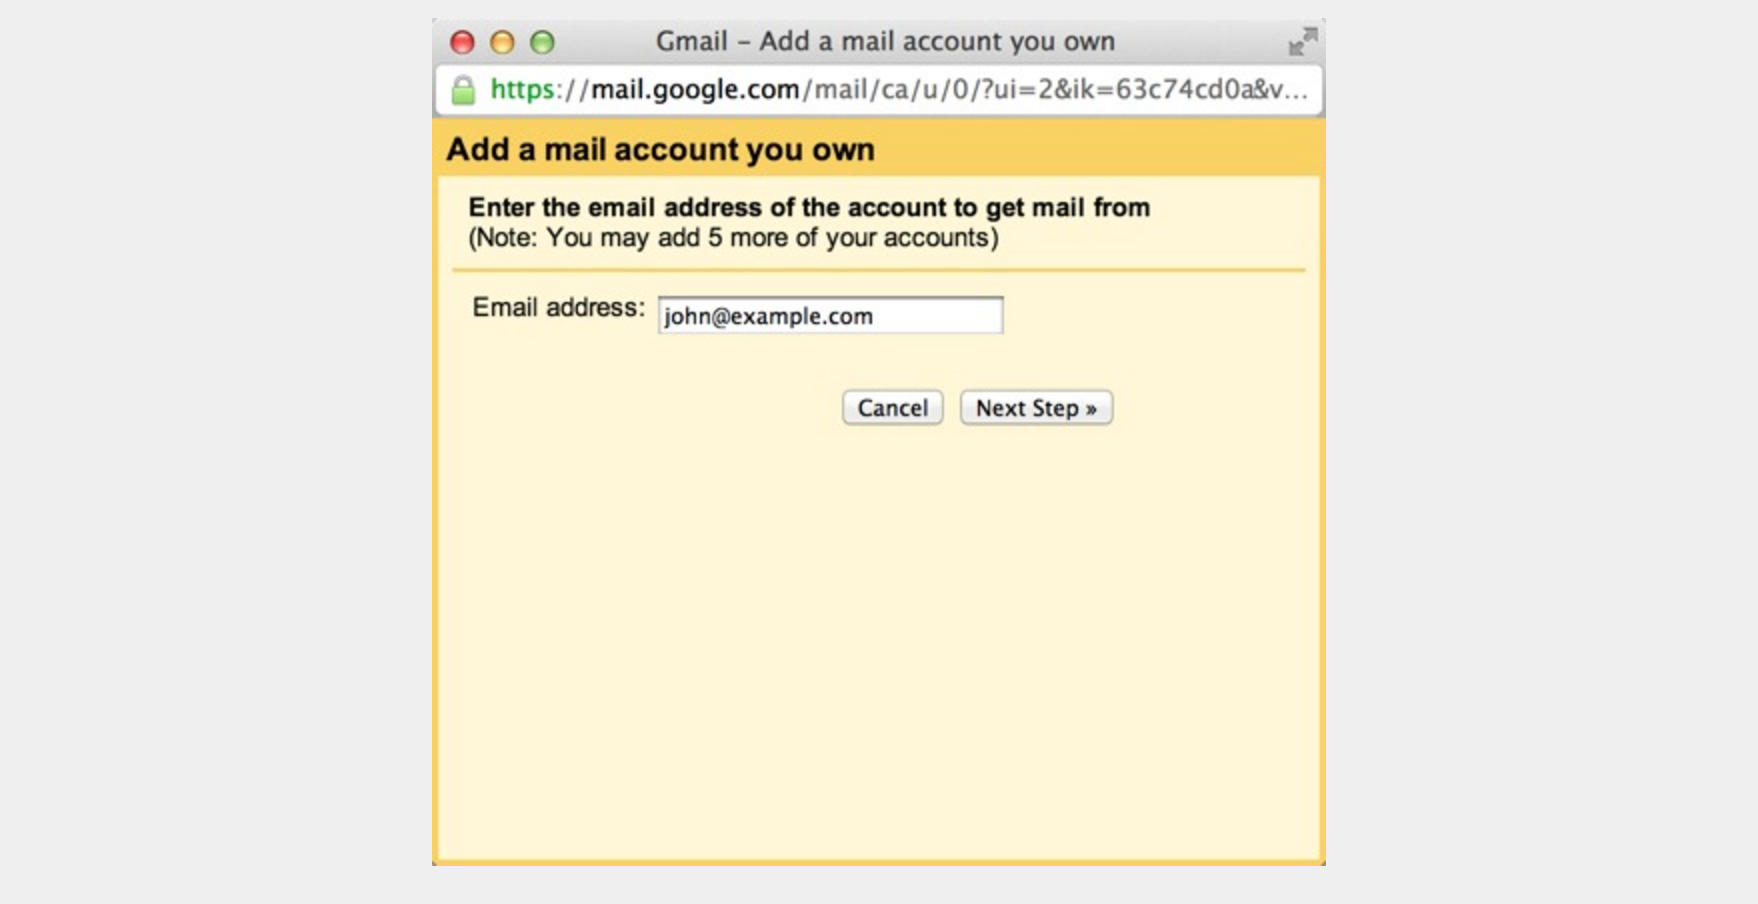
6. Click on “add a mail account”.

7. A yellow box will pop up. Enter your email address that you just created in Bluehost. (Example: hello@iammichellegifford.com)
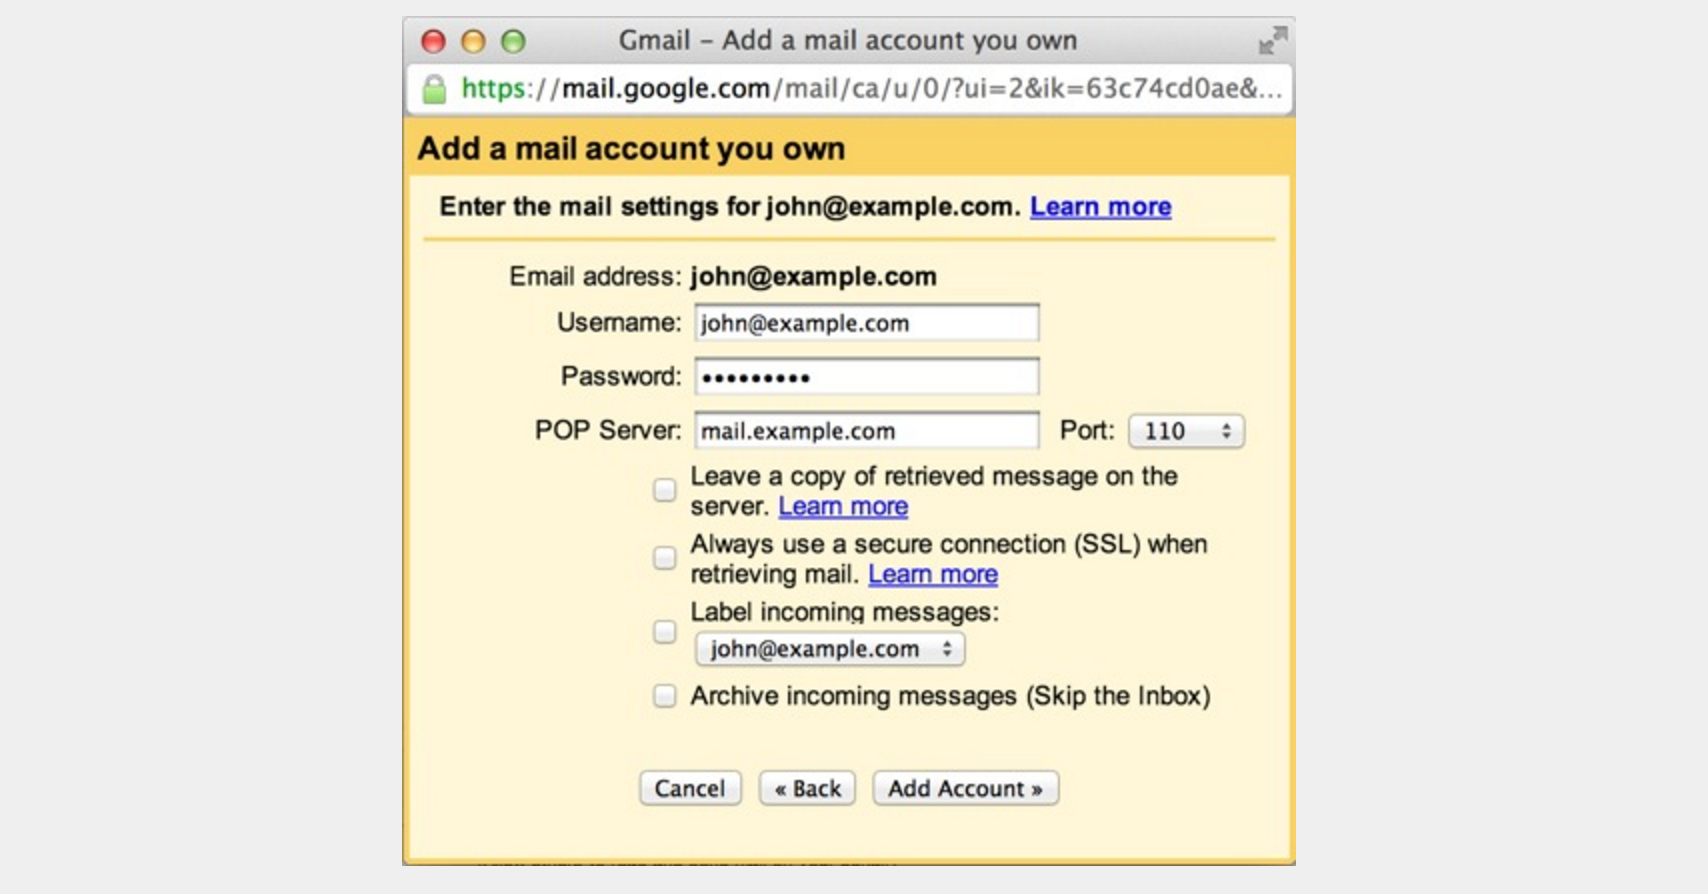
 8. Click the Next button. Enter your full email address as the Username.
Enter Password for your email account that you just set up in Bluehost. Check the box “Label Incoming Messages” and then click add account.
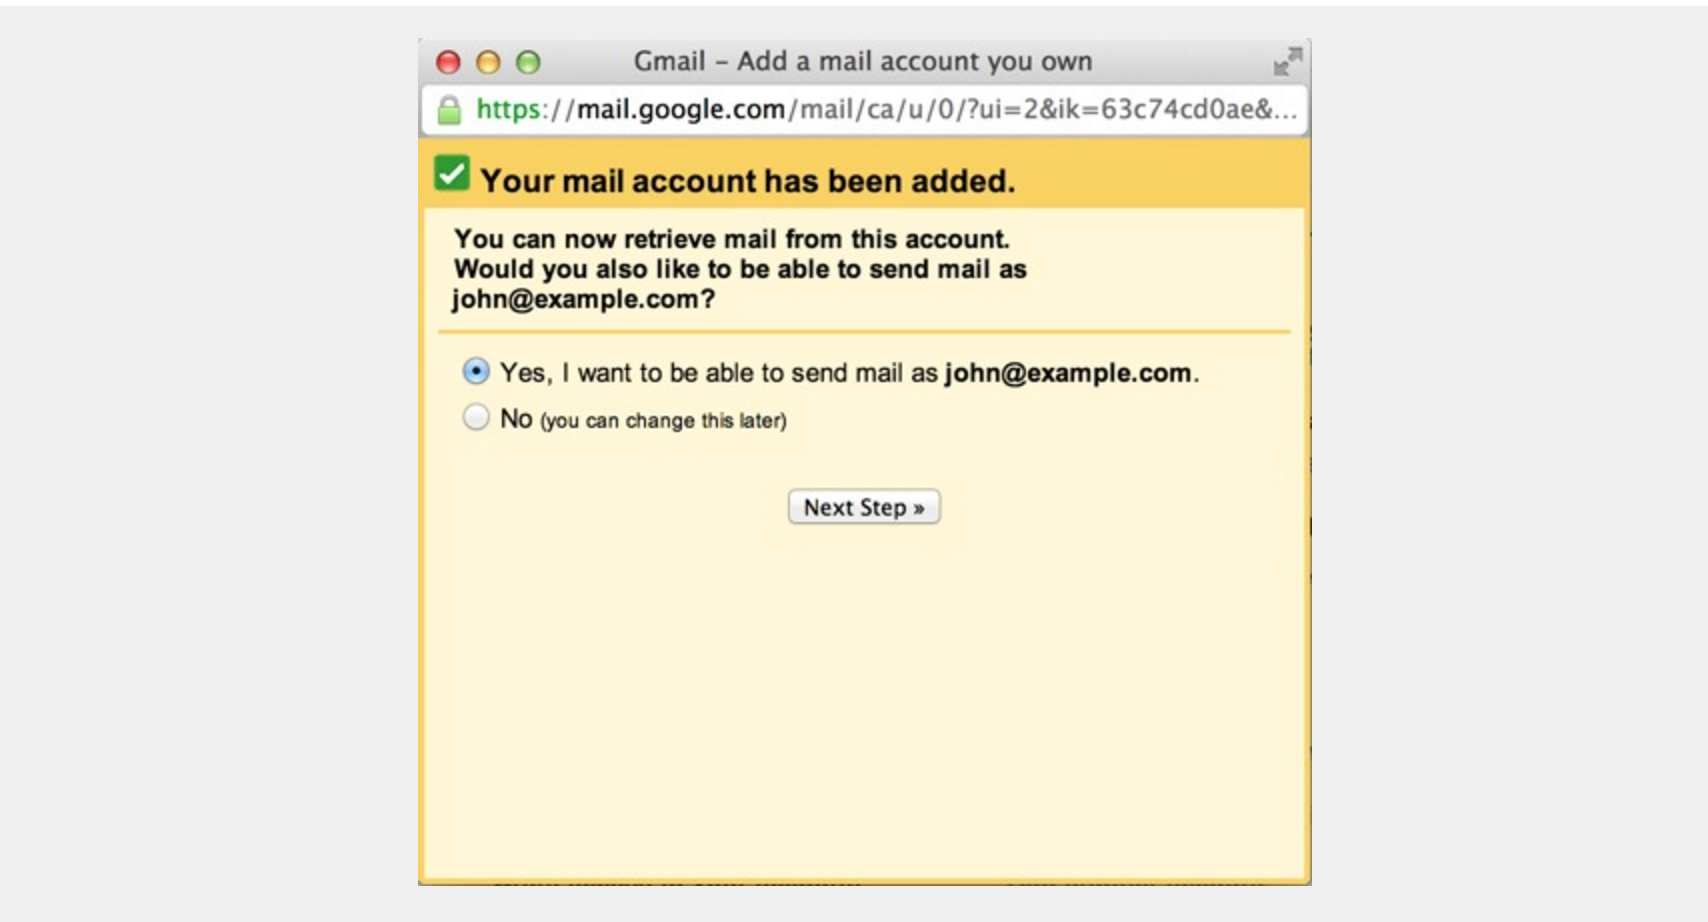
9. Check the box ” Yes, I want to be able to send mail as john@example.com” and then “Add Account”
10. One last yellow box will pop up and it will ask you to put in a verification code that gmail will email to you. Once you get the code in your email (it usually takes five minutes) then click the link and verify your account and you are good to go!
Having your own custom email address is really handy especially when you start growing. I have created accounts for my assistants so that they can send professional emails in the name of our company.
If you haven’t started a blog yet, go on over and check out this step-by-step guide to creating a blog.


Not ready to do this today, make sure you pin this article for later and leave me a comment letting me know how you liked this tutorial.


")


You said...