One of the most important things for any business is brand recognition. Flodesk can help you to coordinate your marketing emails with your brand. With access to tons of templates you’re sure to find just the right fit for your subscribers! So let me show you how easy it is to set up your first Flodesk welcome email for your subscribers.
If you haven’t already signed up for Flodesk, click on this link to get 50% off!
Okay, so you’ve got Flodesk pulled up and you’re logged in—what now?
Find the Right Flodesk Email Template for You
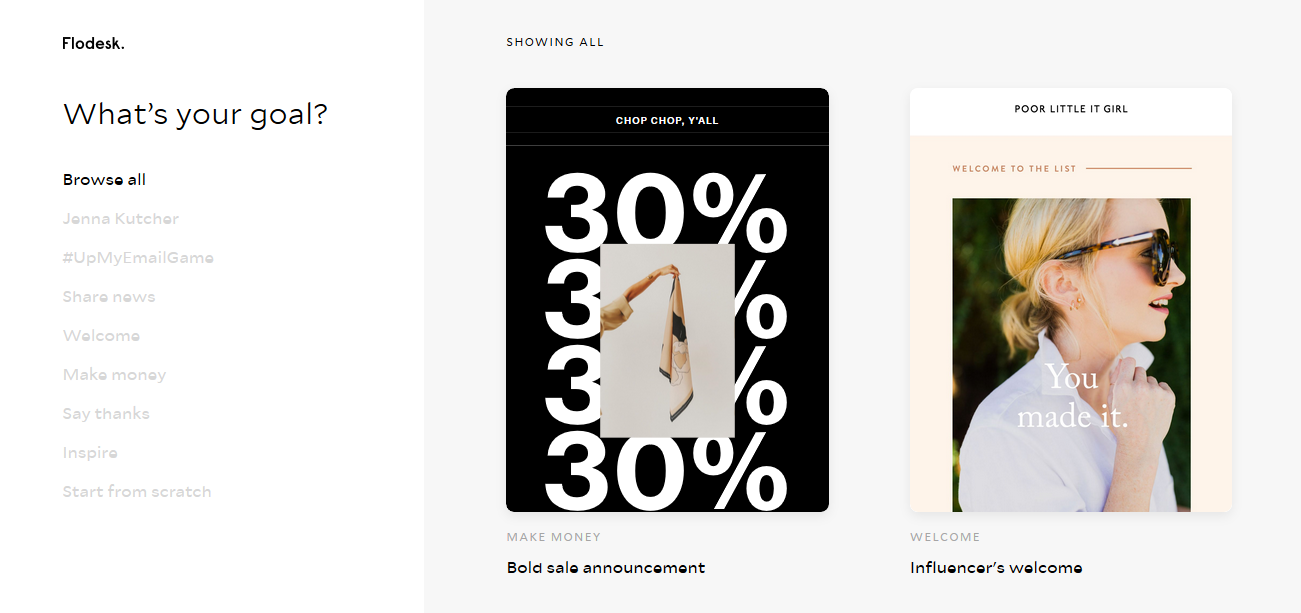
First, take a look in the template gallery. You can find it located under the Emails menu, when you click on Create New. Once you’re in the gallery, you can peruse dozens of pre-made layouts and designs, or you can Start from Scratch and design your own!
One of the ways Flodesk makes this so easy is by helping you to narrow down your focus. Are you welcoming new subscribers? Promoting product? Maybe you’re just so grateful that you have subscribers that you’d like to thank them for giving you some of their time! Or, do you just want to give them a little inspiration for the day? No problem! Just select the category that fits your needs and then click View Details on the design you like best.
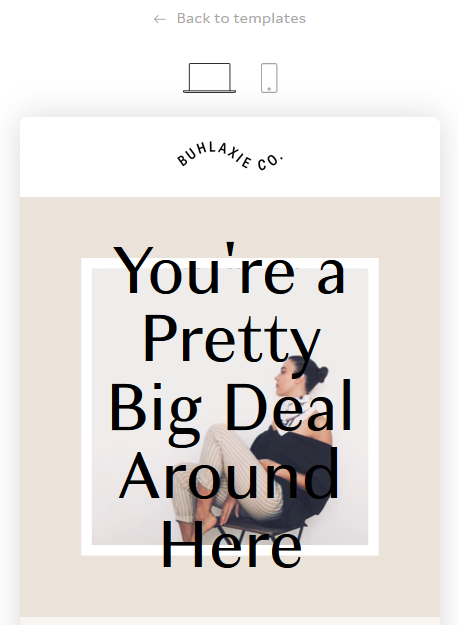
Preview Your Flodesk Email
One of the slick little features of Flodesk is that right up front you can see what your email will look like on both desktop and mobile devices. With just a quick click of the icons, you will get a preview so there are no surprises!

Make It Your Own
Go for it! Click on Customize and let’s start creating your email! You can begin anywhere on the template you like. Just click on any of the elements, and the tools palette will pop up on the right of the screen. From there, use the options tabs across the top to help you make your desired changes. For quick block changes (changes to the space where the element resides), you’ll see a couple of icons off to the right of the element.
The gear will open up the settings for the block for quick changes.
The trash can allows you to remove the element entirely if it doesn’t fit your needs.
And the two pages make for quick duplication of an element.
So. Easy!
Click on this link to get Flodesk for 50% off!

Prepare the Details
When you are done customizing your design, click on Next, and it will bring up the sender information page. On the next few pages you will simply fill out who the sender is, what you want the subject line to be, and insert the preview text for the email. Once you’ve completed that, it’s time to select the lucky recipients! You can select individual recipients, add in a segment (if you’ve already added them to your Flodesk account), or import a CSV file for your contacts.
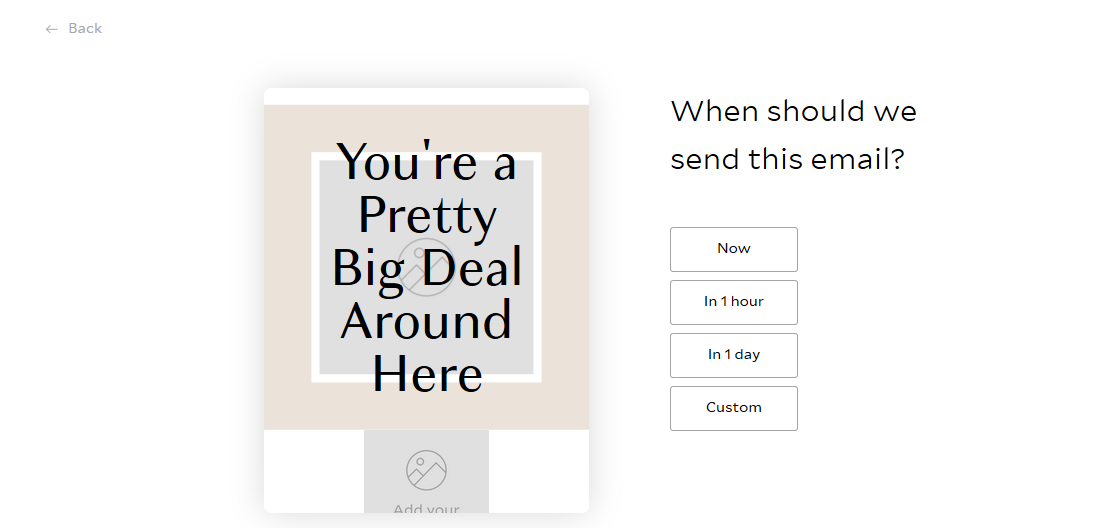
Schedule It
Once you have your recipients added, Flodesk will give you the option to schedule when the email gets sent out. You can send it right Now, In 1 Hour, In 1 Day, or you can Custom schedule it for the date and time of your choosing! Flodesk will even recommend the best time for morning or evening scheduling so you can be sure to reach your subscribers when they’re checking their email!
Send Your Flodesk Email
If you’ve previewed and scheduled, Flodesk is ready to take over! Just click Schedule It, and you are all done! Congratulations! You have set up your first Flodesk welcome email! Woohoo!
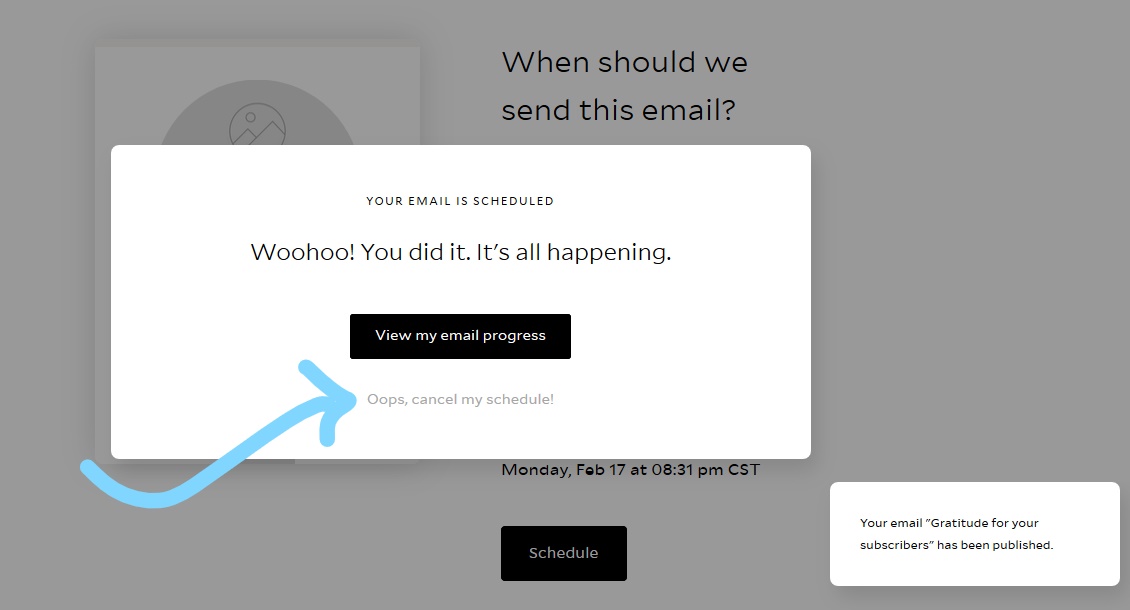
…but, just in case you forgot something, no need to panic! Flodesk gives you a break. You have about ten seconds after you click Schedule It to click on Oops, Cancel My Schedule and return to editing.
And that is it my friends!
For those of you who are just reading along, don’t forget you can get Flodesk for 50% off just by using this link!
You said...