
")


Instagram reels have a new update AGAIN! But don’t worry, because I just created the ultimate guide to Instagram reels. This guide will tell you everything you need to know. Plus, some extra tips that no one is talking about! These bonus tips will finally get you that growth you’re dreaming of.
This complete Instagram reels guide will get you more views and followers than you’ve ever had before. By the end of this guide, you will know how to schedule your Instagram reel, get your reel to the top of search results, and get the inside scoop on some secret features that will level up your reel game once and for all.
The Ultimate Guide to Instagram Reels
Let’s go over each feature on your screen when it’s ready to record an Instagram reel. We are starting on the left side and working our way through all the features listed at the bottom of your screen.
Instagram Reels Feature #1: Music/Audio

This feature is where you are going to find any audio that you want to add to your reel. You should see two lists that say original audio and music. You have the option to explore what’s trending, search for specific audio, or even select the “saved” button and it will show you all the audio you have saved in the past from a reel you’ve watched on Instagram.
If you want to add your own audio, click “Import” and it will give you the option to add audio from a personal video. You only follow this step if you want to use audio that does not already exist on Instagram.
Biz Pro Tip: You most likely know when you use trending audio your chances of getting more reel views highly increases. BUT it will make even more of a difference if you use the trending audio that has been used less than 10 thousand times. If it’s been used over 50 thousand times, move on and look for the next trending audio.
Instagram Reels Feature #2: Effects

This next feature is where you can scroll through and find different effects you may want to include in your reel. It mainly gives you options for the filter you want to use.
The green screen option is one of my personal favorites! It’s super easy to use and makes a huge impact when engaging your followers. All you have to do is add the image you want to be in place of the green screen. Next, pinch the image of yourself to shrink it down and make your reel that way. This is a fun one to teach about something people are using right now!
You can also scroll through the different filters and save your favorites. Just click on the save icon that is in the bottom left corner of your video recording. That way you can scroll through your favorites and not have to search for them every time you post a reel.
Instagram Reels Feature #3: Video Length

This feature gives you the option to choose between 15, 30, 60, or 90 seconds for your reel length. Depending on the type of reel you are creating, choose according to what you think you need to adequately get your message across. However, I will say that shorter reels tend to do better at keeping attention and getting more views. AND make sure you have a good hook that brings people in right away no matter the length of the reel!
If you want some help with creating powerful hooks, check out my FREE 131 Hooks Guide HERE.
Instagram Reels Feature #4: Video Speed
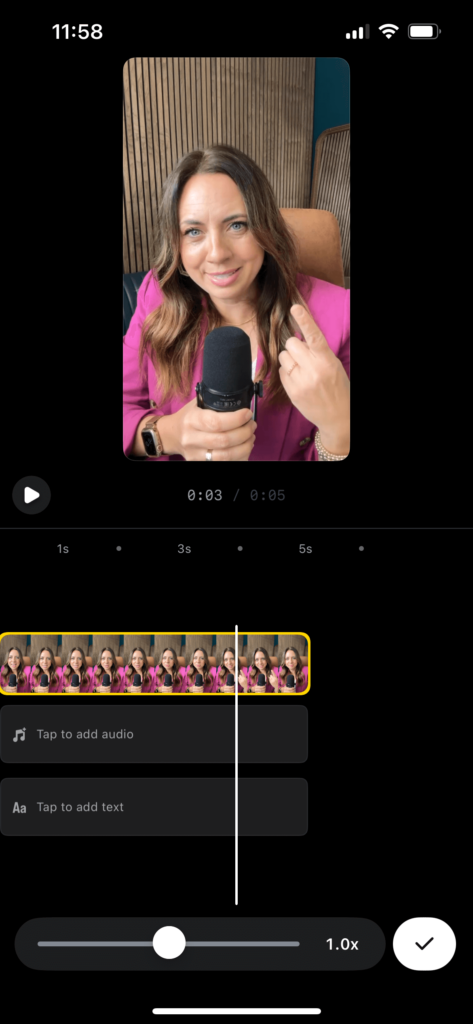
This feature gives you the option to adjust the speed of your video. This comes in handy when you are using trending audio and you want to sync your lips with it.
It’s usually hard to line up your mouthing exactly with the audio. To solve this, you can actually speed up the video and it will slow down the audio, making it easier for you to follow the audio and line it up more perfectly.
Instagram Reels Feature #5: Layout

This is where you can choose different layouts for your reel. You would be in one portion of it and maybe you add a picture or another recording in another space. This feature works great when you want to explain something like a news article and you want to show a screenshot of it in the bulk of the video and your recording underneath it explaining your thoughts on it.
Instagram Reels Feature #6: Timer
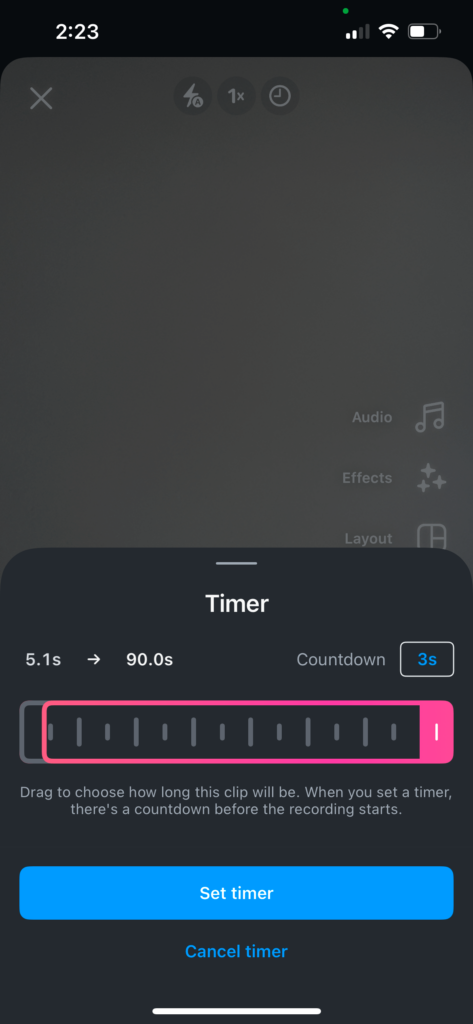
This feature is going to be your best friend. This is where you can pinpoint exactly how long you want your reel to be. For example, let’s say you want to record a reel for 12 seconds. You can adjust the timer to that time and it will automatically stop recording at that 12-second mark. This helps a lot when you want to record something and your phone is on a tripod or something similar and your hand isn’t right there to hit start and stop.
The best part about this timer feature is that it gives you a countdown for the recording to begin. You can choose between 3 seconds or 10 seconds. I especially like using this feature when I’m using trending audio because sometimes it begins as soon as you hit record, so this countdown option gives me a second to catch my breath, start on time, and align my recording with the audio.
Instagram Reels Feature #7: Dual
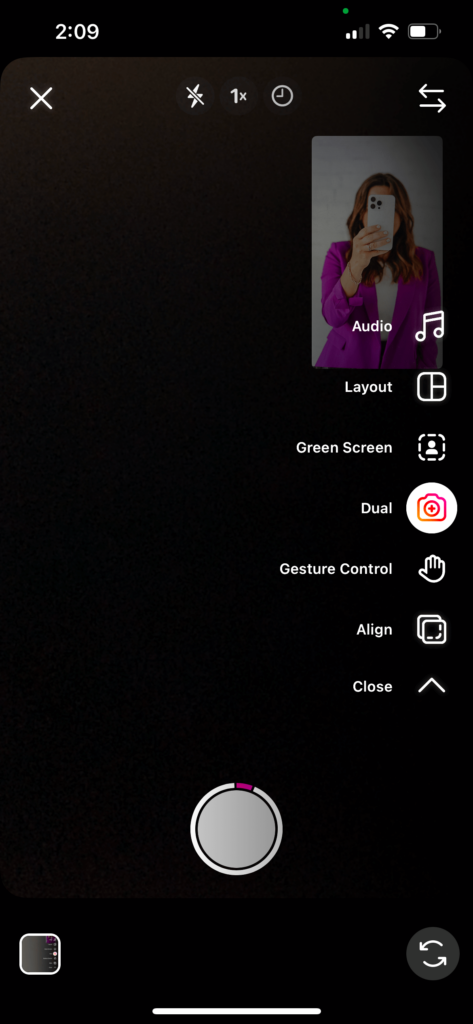
Dual is when you can record yourself and the flipped view of your camera at the same time. You will be in the bulk of the video, and your flipped view will be in the top right-hand corner. One way to use this feature is to show your reaction to something you watch in real-time. This feature helps your viewers experience something with you which will help them feel more connected to you.
Instagram Reels Feature #8: Align
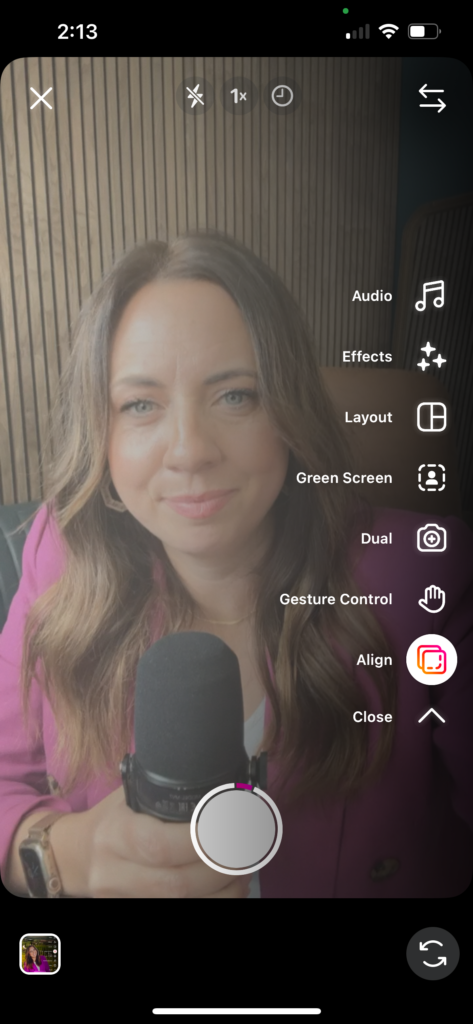
The last feature we’re going to talk about is Align. This helps you a ton with transitions. It will save your position of where you were on the last frame of your recording, so you can align yourself with it as best you can for the next part of the recording. Lining yourself up with your last frame will make your transitions seamless.
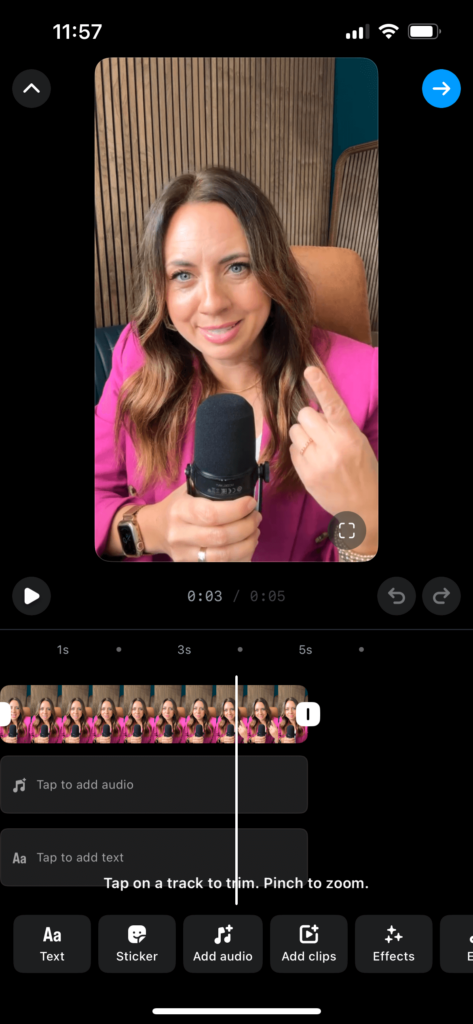
How to Use the Instagram Reels Editing Features
Instagram has added some really amazing features to help edit your reels faster. If you go to the screen where you create reels and scroll down to one of the videos you’d like to use, you can test out the new editing features to see how they work.
Multiple Videos
Tap the button where it allows you to select more than one video. You’ll want to select more than one if you want to use several to create one reel. I recommend having each clip last only 2-3 seconds because it helps get people engaged.
You can also tap the gray circle to bring up different transitions you can choose between. Find your favorite and then tap “Apply to all” and it will add the transition in between each of your clips.

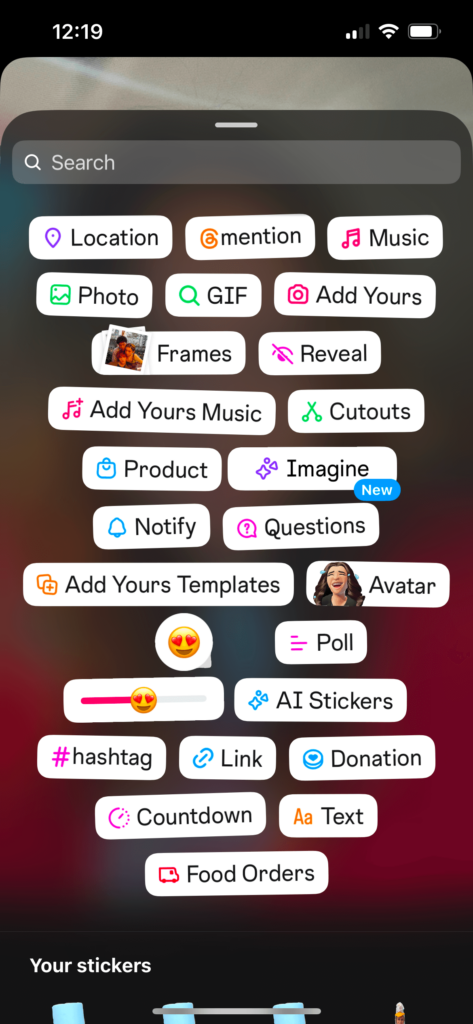
Stickers
You also have the option to add a sticker to your reel. There are tons of different ones to choose from, and it works the same way as if you were adding a sticker to your story. So you can add a poll, an animation, etc.
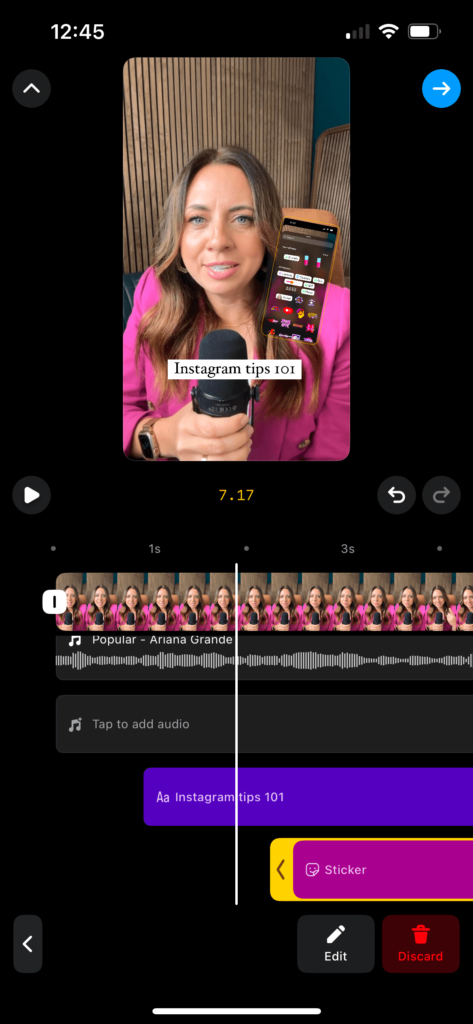
Editing Layers
One important thing to note is that when you are editing your reel, you’ll notice 4 different layers you can edit. The base layer is your video, then the audio, then the sticker, and the last layer is the text. This is a really nice editing feature because it allows you to edit each layer individually rather than one video. You can get those details just right and post a crisp and engaging reel that people will love.
And don’t worry, if you realize as you’re editing that you don’t like the order of your videos you can hit the “reorder” button and it will allow you to change the order of your clips. You can even add in more videos if you’d like. This is really nice to have because sometimes you don’t realize what you want until you start messing around with it and getting closer to finishing it up.

Before You Publish the Reel
OK, you now have this beautifully edited reel ready to post on your Instagram. Once you hit next, you’ll be taken to a new screen where you can finish up the last details. First, you’ll want to edit your reel cover. It’s best to edit this to a related picture rather than a random spot of the reel.

The next thing you need to do is write your caption. Your caption should include keywords, a headline, a call to action, and hashtags. All four of these things are super important to include in your caption! This is what helps your reel pop up in a search by someone who is looking for your type of content.
Instagram is becoming more and more of a well-oiled search engine. Take advantage of those features to get your content seen. You can check out my post HERE which goes more into detail about how to implement SEO in your Instagram content.
You’ll also want to add topics to your reel. You’ll find this under the tab “More Options.” You can choose up to three. This is another way that helps Instagram figure out the type of content you’re sharing and who to put your content in front of. (This is one of the ways you make the Instagram algorithm your secret weapon!)

The last thing you will want to do is go to Advanced Settings and schedule your reel. Are you so excited about this feature?! You can now batch-create reels and get them all scheduled. So you can create content for weeks at a time and not have to think about it. And you’ll still have a reel automatically posted every single day. This is a content creator’s dream, am I right?
Main Takeaways
- There are 9 Instagram Reel features. Each is explained above.
- Music/Audio
- Effects
- Add Yours
- Video Length
- Video Speed
- Layout
- Timer
- Dual
- Align
- When you are ready to edit your reel, you can select multiple videos that you’d like to compile into one reel. I recommend having each clip be 2-3 seconds to keep it engaging.
- You edit your reel in 4 different layers, one layer at a time:
- Video
- Audio
- Sticker
- Text
- Make sure to always include a caption in your reel because this helps with SEO. In other words, if you use keywords in your caption your reel has a greater chance to get seen by your target audience through an organic search.
The Ultimate Guide to Instagram Reels
That was a lot of information, but it’s all needed so you can become an Instagram Reel pro! And I didn’t call this the ultimate guide to Instagram reels for nothing, right? I’d love to know if you have any questions about making reels, so come send me a dm over on Instagram @iammichellegifford. And give me a follow so you can keep getting the best tips for running a successful biz online!
If you want to know even more tips on creating engaging and viral reels, check out these posts:
- The Ultimate B-Roll Guide for Instagram Reels
- 7 Tips to Multiply Your Instagram Reel Reach
- 3 Tools to Make 30 Instagram Reels in 3 Hours
- How to Make Words Pop In & Out of Your Reels
- How to Add a Voiceover to Your Reel


")


You said...